How This Blog Is Built: A Reproducible Pipeline for Scientific Writing
Published:
I’ve decided to make my first post on my blog a bit of a meta-post. The purpose of this post is to describe how I built my personal website, including the decisions that went into various design components. This post serves as a reference for anyone looking to design a similar website.
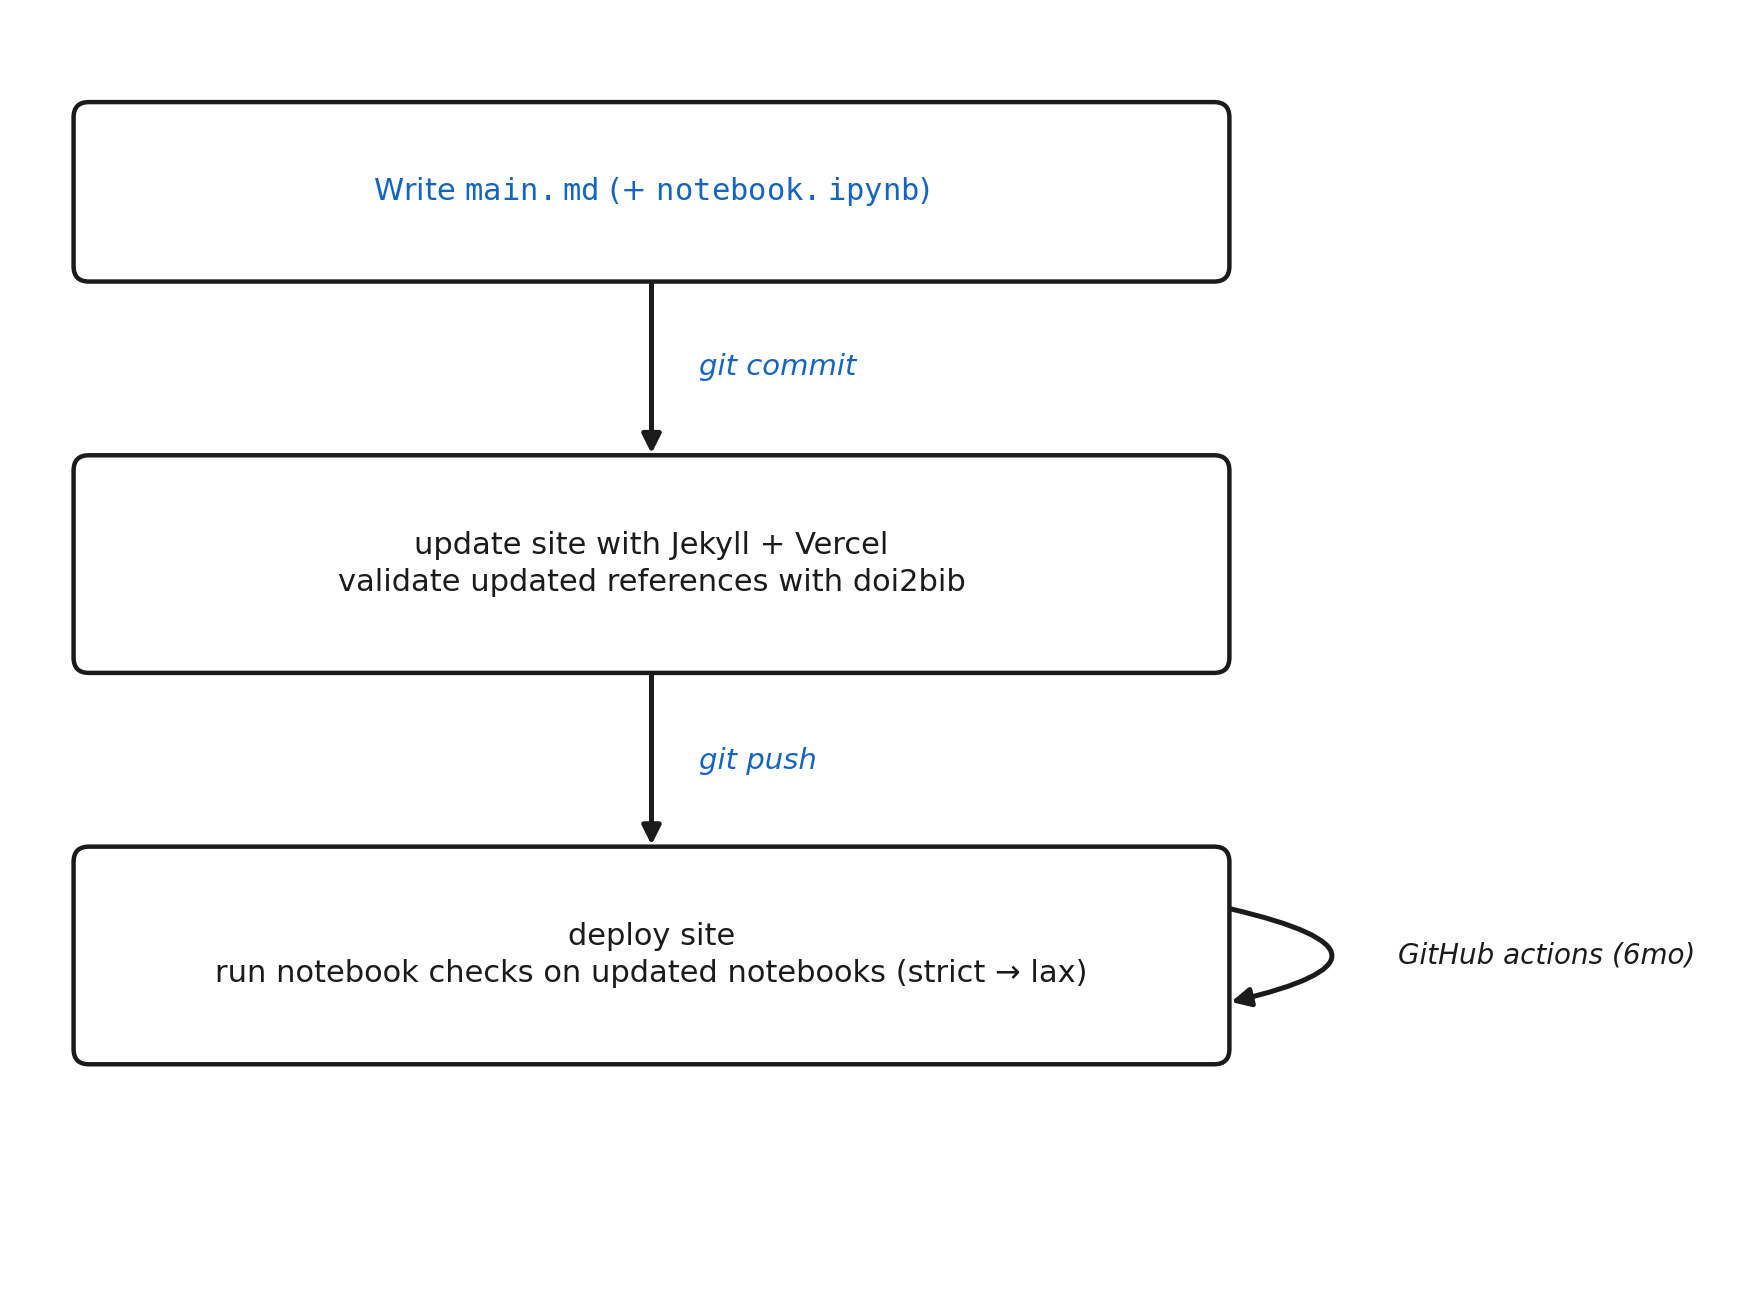
Blog writing workflow. Blue = manual; black = automatic.
Hosting: Vercel
I host my website on Vercel. The benefits of this include DDoS protection, analytics, and easy deployment. My site consists primarily of text and small images, so a static site made the most sense.
I opted for Vercel over graphical website design tools, such as WordPress and Wix, for a number of reasons, but the main reason being easy programmatic updates with just a markdown file and a single git commit+push rather. No need for logging into websites and interacting with GUIs for each update. GitHub Pages is a valid alternative to Vercel. I opted for Vercel primarily because of my familiarity with the service from other projects, but GitHub Pages offers many of the same benefits.
I use a pre-commit hook to convert blog post markdown files into pages on the site with each commit. Specifically, this hook converts each entry in posts/<title>/main.md into a Jekyll post under site/_posts/<title>.md and copies the associated images into site/images/posts/<title>. That keeps the rendered site in sync with the source posts on every commit, with no manual publish step.
Site generation: Jekyll
For static page generation, I use Jekyll. Jekyll converts the pages of my website, including blog posts and selected publications, from Markdown to HTML. It also combines each page with reusable templates, stylesheets, and configuration files to generate the complete website. I use the theme academicpages, a fork of Minimal Mistakes, because I like the appearance (nothing deep here). The resulting site consists entirely of static files, making it fast to load and requiring virtually no server-side infrastructure.
File system
All website content lives in the GitHub repository josephrich98/joseph_rich_blog. Each blog post contains its own directory, named after the post title.
posts/<slug>/
  main.md            # the article: Markdown + YAML text + LaTeX math
  references.bib     # the references: Generated from Zotero with Better BibTex
  notebook.ipynb     # the analysis that runs analysis and generates figures
  scripts/           # plotting / analysis code, runnable standalone
  figures/           # generated plots (git-ignored)
  data/              # datasets + a README describing each source (git-ignored)
  requirements.txt   # the pinned pip packages for this post
  environment.yml    # thin conda wrapper: Python + pip + requirements.txt
  Dockerfile         # a container that reproduces this post
Each post is just a Markdown file main.md. Markdown struck a good balance between simplicity and expressiveness. It enables basic features such as text blocks, headings, equations, images, hyperlinks, and code blocks. I write most of my academic manuscripts in LaTeX and considered using the same for this page, but it felt a bit overkill in the absence of customized post layouts, extended mathematical proof derivations, and detailed figure specifications.
Accompanying each post is a Jupyter notebook notebook.ipynb. This notebook contains code to reproduce all analyses from the post. Scripts with longer runtimes, called by the notebook, are included in the scripts/ directory. Data files are stored in data/, which is git-ignored because files might be large and unnecessary for site generation. Code for data download will always be present in the notebook or as a script when publicly available to ensure full reproducibility. Figures are written into figures/, also git-ignored as these are a copy of the figures stored in the site directory.
For reproducibility, each post also includes a requirements.txt file, environment.yml file, and Dockerfile. While perhaps a bit overkill, it represents a trade-off between ease of use and reproducibility. The requirements.txt file is the simplest option and requires only a Python installation, but it does not specify the Python version or non-Python system dependencies. The environment.yml file additionally specifies the Python version and many system libraries available through Conda, providing a more reproducible software environment. However, it still relies on the host operating system. Finally, the Dockerfile packages nearly the entire runtime environment into an isolated container, providing the highest level of reproducibility, although it requires Docker to be installed and permission to run containers. For readers who don’t want to install anything, each notebook also opens directly in Google Colab from a badge at the top.
When making changes to the website, including the addition of a new blog post, I always work in a branch to avoid pushing incomplete changes to the main site. Every branch automatically receives its own preview deployment, allowing me to review changes before merging them into main by visiting https://joseph-rich-blog-git-BRANCH-josephrich98s-projects.vercel.app. I then merge the branch into main once the changes are ready.
Domain hosting: Cloudflare
I manage my domain through Cloudflare. It is one of the most popular domain registrars, offers competitive pricing (around $11 per year at the time of writing), and provides reliable DNS management with seamless integration into services such as Vercel.
Comments: giscus
As mentioned earlier, the entire site is hosted on GitHub. This enables benefits such as version control, programmatic updates, and familiarity with tools in the ecosystem such as branches and GitHub Actions. However, natively, GitHub does not support comments. This is where giscus comes into play. giscus provides a comment section interface for each post, with data stored as a GitHub Discussion. Unlike hosted comment widgets, giscus serves no advertising and sells no data. giscus requires that each user has a GitHub account, which could be seen as a drawback since it is an extra barrier to commenting for those without an account. However, it is also a feature in the sense that it ensures user verification and identity, enabling discussions to be more intentional.
Testing and CI/CD: Pytest, GitHub Actions
In order to ensure that all notebooks associated with blog posts run correctly, I run a pytest for each notebook using NBVal in both strict and lax mode. This two-level design allows me to distinguish between code errors and logic errors. Lax mode only runs if strict mode fails, preventing redundant checks.
A test for a post only runs when a file associated with that post (outside of main.md or any file in figures) changes in a commit. This prevents unnecessary checks. While environment reproducibility files generally pin python dependency versions, there is also a GitHub Action to rerun pytests for each notebook every six months to ensure that notebooks remain working.
Writing
While not part of the technical stack of the website, there were a few notes I wanted to make about my habits around writing blog posts.
I use Zotero for citation management. This tool enables directory structures for project management, BibTex export, web browser extensions for citation addition with a single click, and integration with Google Docs and Overleaf for automatics citation updating (not used in this blog, but useful for many of my other projects). Citations are automatically updated in each post through the pandoc referencing of entries in the references.bib file. There is another pre-commit hook to verify that each reference in references.bib contains a valid DOI, verified against doi2bib
(https://doi2bib.org/bib/<DOI>)
All posts are written entirely by me — no AI writing. I sometimes use AI during brainstorming, citation retrieval, code assistance, and spelling/grammer checks. But all ideas and words come from me. If you wanted to read from ChatGPT, you could visit ChatGPT yourself. The purpose of my blog is to share thoughts that come from me directly. Plus, the writing part is fun. It’s a fun blend of academic and creative thinking that gets the juices flowing in some of the dusty parts of my right brain. So you won’t be seeing things such as “it’s not A, but B,” “this is the right place to pause,” or “the bottom line, summarized honestly.” But for the record, I liked em-dashes before they were cool.
Conclusion
This setup allows maintaining the blog to be effortless from a technical standpoint. To add a new blog post, I simply make a directory in the posts directory containing a main.md file (and the associated Jupyter notebook and environment reproducibility files for best practice) and push my changes to GitHub. To add a publication, I simply add a file in site/_publications/<date-name>md. That’s it.
Behind the scenes, the notebook is verified to run, the Markdown is converted to HTML, and the site is deployed. The setup is completely free besides the minimal domain hosting cost (which can also be eliminated by using the free Vercel or GitHub Pages subdomain). There is site protection, analytics, version control, and automated testing and deployment. And everything can be fully controlled from the command line.
You know what they say: “If you want to change the world, start off by streamlining your website.”
Reproduce all analyses in this post here.
All writing is my own. AI was not used to write this post.
Leave a Comment